
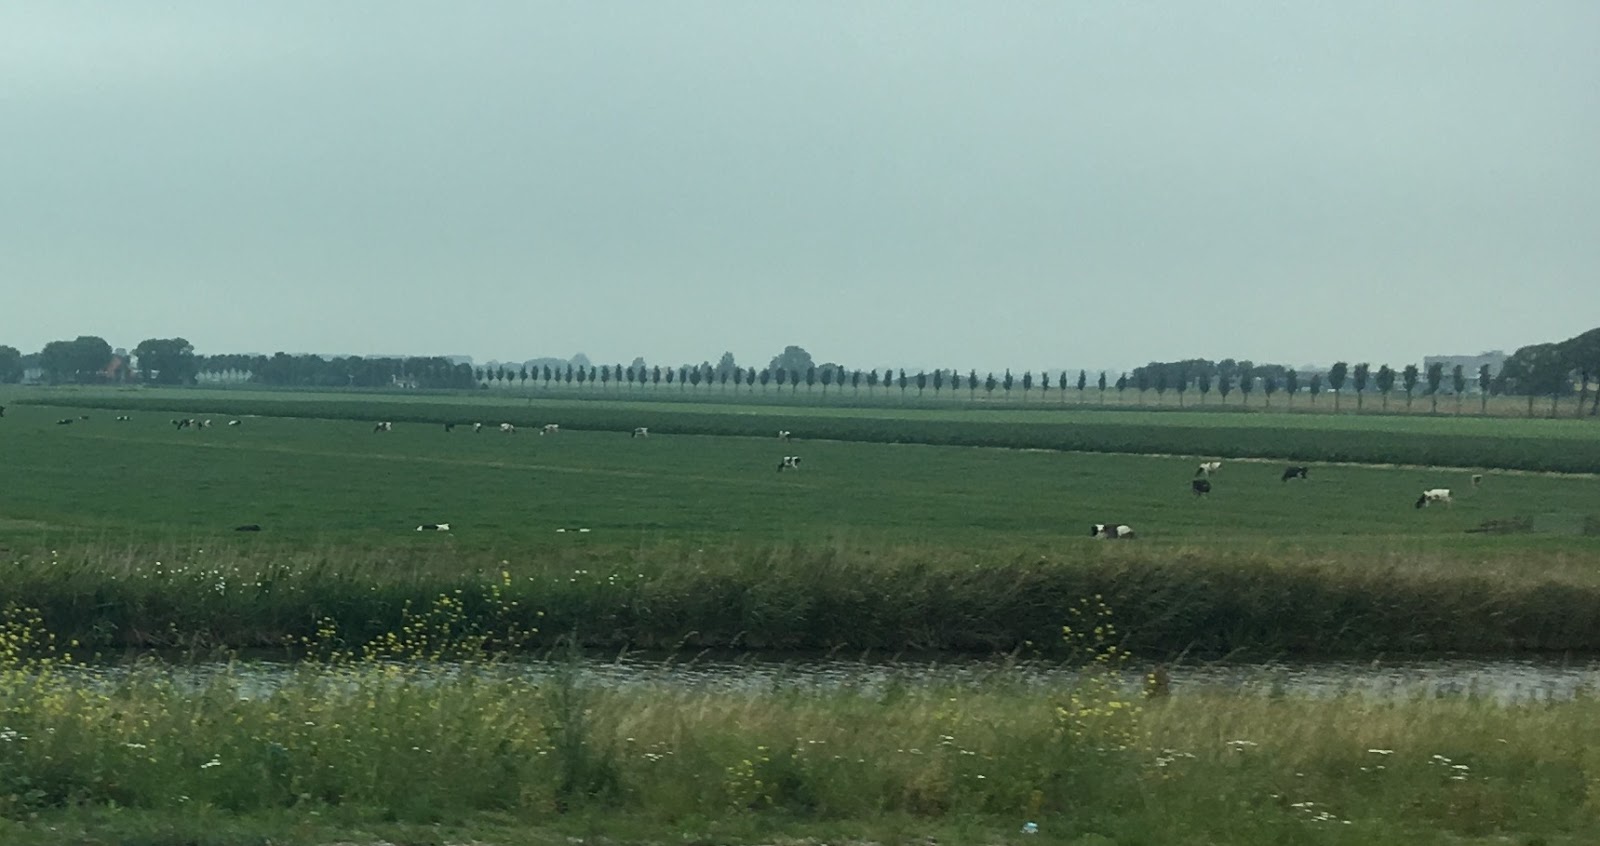
My family and I took a wonderful trip to the Netherlands last summer. One of my favorite things was the bus ride from Amsterdam out into the countryside. I was entranced by the lines of trees.
I've zoomed in and cropped this picture so it's blurry, but you get the idea.

Here's another. The cows too!
This was the beginning of my inspiration for a new art quilt collage. Another bit of inspiration was my desire to enter the "large appliqué" category at the Quilters Guild of Dallas annual show which requires quilts be at least 72 inches on one side, but not all sides. Aha. I could made a long narrow landscape design. I took those two parameters and got to work on some sketches.

I put some strips of fabric up on the design wall.

I tried some other fabrics and began cutting strips of trees including big round trees #1 in blue.

Then I tried some other fabrics and cut some more trees including big round trees #2 in aqua.

I knew I wanted to break up the trees with a wide house-like shape similar to the barn in the top photograph. This would be a great place to incorporate some handwriting as a surface design pattern. I tested some pens and colors.


With the addition of the green barn and big round trees #3 in red, I eventually arrived here.

There are lots of problems with contrast in this composition which meant I needed to shop for some alternatives. I brought swatches with me.

After lots of time at the design wall, the dining room table and the ironing board, I was able to move forward and began adding strips within each layer that were similar in color, but different fabrics and patterns.
One of the pieces I wanted to add was this lovely green pointy print.

But I only had a tiny bit. I sent a desperate text to Kristin LaFlamme and this yardage arrived a few days later. Yeah!


By this point, I was growing weary of working on something so wide. Because all those strips go all the way from left to right, it was tricky to move them around, get them fused together and keep everything aligned. That's part of the challenge of working with an improvisational collage technique. But I can't imagine doing it any other way.
I wanted to break up the wide strip of red on the bottom and remembered the grasses growing along the roadside in the Netherlands.

Ta Da... grasses.

At this point, I decided it needed something else. My work is all about layering fabric, paint and stitching and this piece did not have as much paint as it could have. I mean, there's already a lot going on, but sometimes more is more.
I sketched some possible motifs to create a foam stamp.

It's a little scary to add stamped painted patterns on top of the finished fused top but I did it. I didn't take any pictures of the process though. You can see the green leafy shape in the foreground as I'm fusing the entire quilt to batting on the dining room table.

The finished fused top. Can you believe how many steps it takes to get here?! I'm glad I added the green stamped leafy motif. It visually ties the layers together.

The sun-like shape in the sky strip is a pattern I created using a hot-glue gun stencil. I wrote about this technique for Quilting Arts magazine.
I printed several copies of the quilt and began planing the stitching.

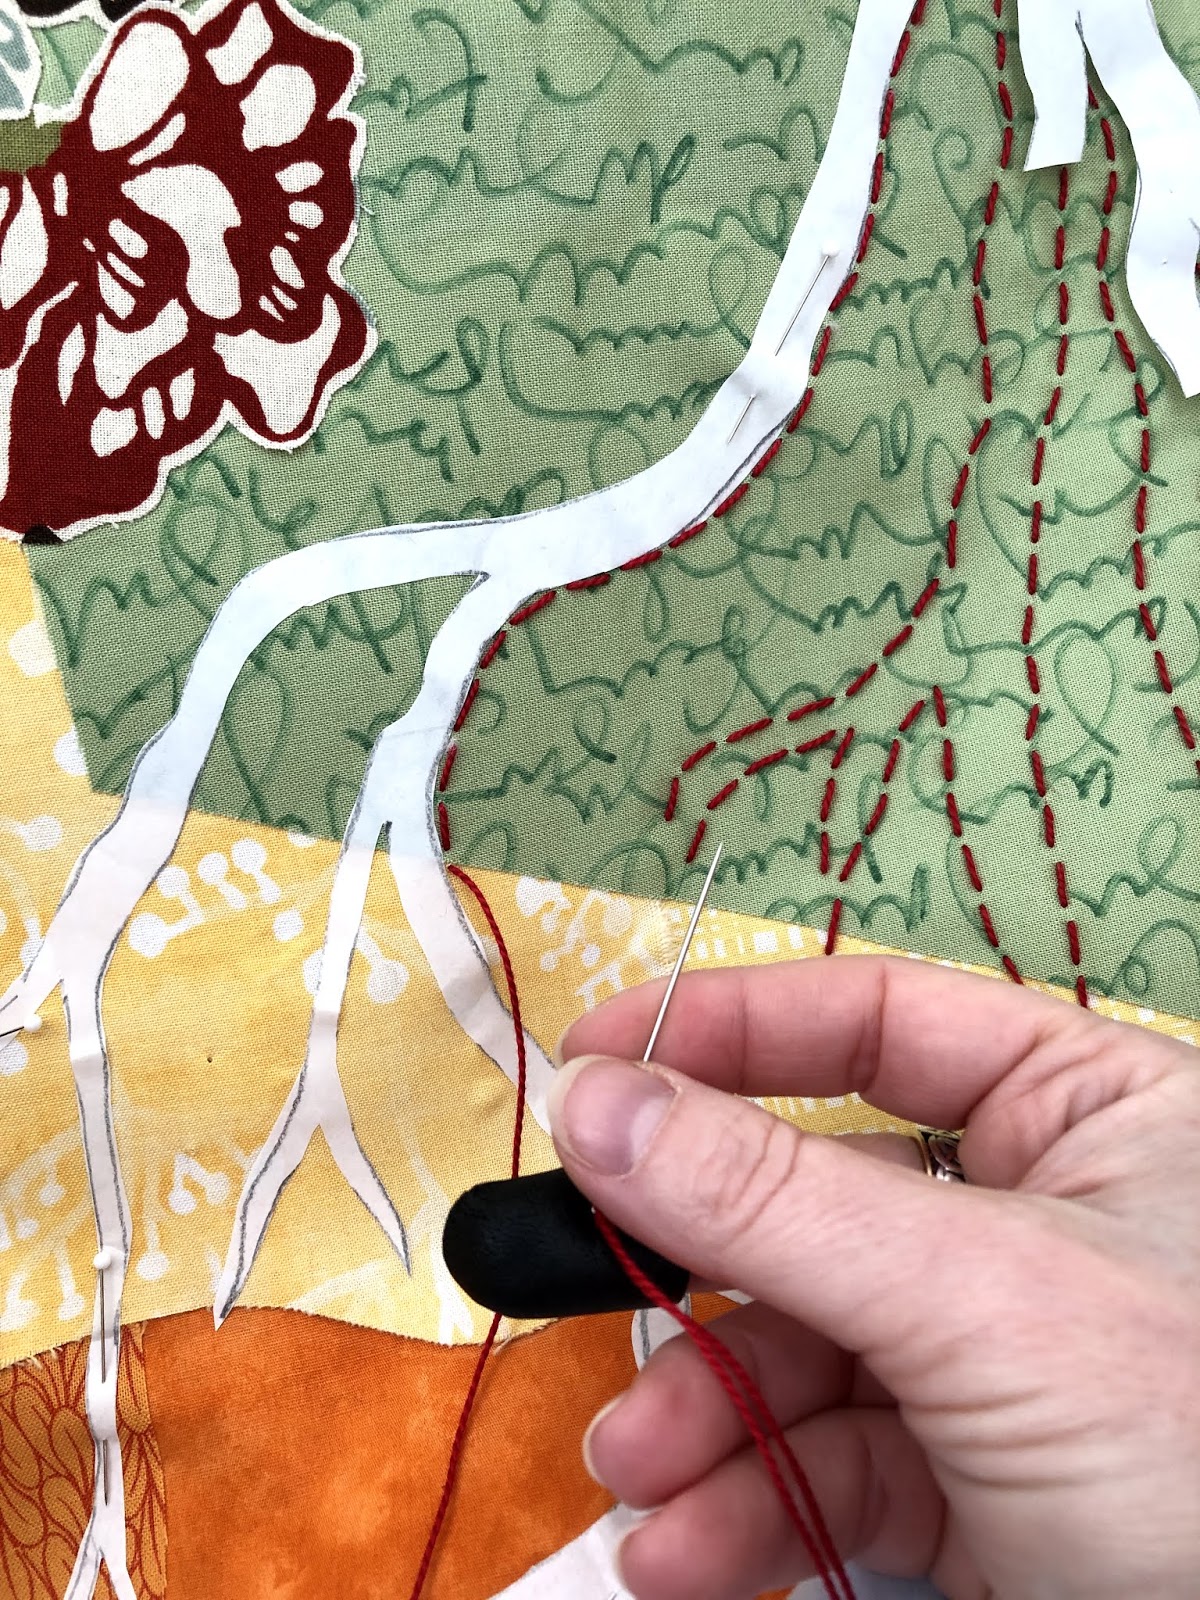
I knew the green house needed something. Eventually I decided on a ghost tree silhouette.

I created the tree pattern using freezer paper that I ironed to the top to stitch around. I sometimes like this method better than marking the design on the quilt top. Yes, the freezer paper peels off eventually, but it's easily reattached. Pins helped the process too.
After finishing the hand embroidery, I fused on a backing and added free motion machine quilting.
It did hang in the Dallas Quilt Show in the large appliqué category!

I am also delighted to say that it has been juried into an upcoming Studio Art Quilt Associates global exhibition called Connecting Our Natural Worlds which will premier at the Arizona-Sonoran Desert Museum in Tuscon, AZ in October.
I recently had Treelines and some of my other work professionally photographed.

Treelines, 30 x 80 inches

I love how the ghost tree silhouette turned out.

The yellow fabric with the blue raindrops was created using the rolling prints techniques I demo'ed in this video.

See the tiny snippets of the black and white stripe? They are my suggestion of cows.

Thanks for scrolling through all those pictures! I hope you enjoyed a peek into my process.
Oh, by the way, the big round trees in blue and aqua and several of the other rejected trees from this project have already made their way into other quilts. Scroll through my Instagram and see if you can spot them.
***
If you're intrigued by my process, you may enjoy my book Art Quilt Collage: A Creative Journey in Fabric, Paint and Stitch.
I've also created a workbook called Head, Heart and Hands: Developing Your Creative Voice which includes lots of ideas, inspiration and thoughts about how I arrived at my unique style and process.
11 comments:
I love this. Thanks for sharing your process. I know it was a lot of work to remember to take all the photos while in the creative zone.
I love the rolling print video. I subscribed to your youtube channel. :-)
Deborah! I just love this piece and love seeing your process!
Wow. Thank you for this whole process! I love the whole thing!
Thank you for documenting the whole process & recording your thoughts as you worked through it all. Thank you again! Maybe you'll get to Australia one day!!!
I love seeing your process. And I have a similar love for the Netherlands. The tree lines and the walking paths between acres of plants are so beautiful and a relaxing way to walk. Checked out the videos and thought they were great too! Kudos to you for documenting this piece.
Loved seeing how our landscape inspired you. I always feel so at home when I am back in Zeeland, the part of the Netherlands where I was born, and have these wide vistas only broken by tree lines. Great documentation too
Enjoyed learning about your process. Lovely quilt.
Living in a ranching area, I am very familiar with tree lines -- used as wind breaks as well as for holding water in the soil. Of course, there are also cattle (not always Holsteins, like the ones in your photos, but always interesting!), bison and sometimes llama or alpacas. And yes, large structures like barns and grain bins. I was interested to see how you would interpret what you saw, and really love the resulting combination of textures, impressions and echoes that you created with fabric, paint and stitch. :-)
Wonderful! I enjoyed the process :-)
xx
Thank you for sharing your process Deborah. Very brave of you to use this process on such a large scale, it would have taken some time. I love your use of colour and the stencil you used for embroidery it is so effective. I will definitely use your example of printing before quilting and can see it would have helped with my recent (SMALL) quilt to judge where to add painted shading. Thank you!
Thank you for sharing your process!! I love your works.
Post a Comment